


Introduction
What if you could harness the power of AI to create content or automate tasks for your blog or app, all while keeping your data private and costs minimal? That’s exactly what I’ve achieved at AI Mind Center, where I use Ollama to run large language models (LLMs) locally and integrate them with .NET for seamless, secure automation. Whether you’re a developer crafting innovative apps, a tester ensuring output quality, or a business analyst optimizing workflows, running AI locally offers unmatched control and flexibility. In this post, I’ll guide you through setting up Ollama with a simple .NET app to interact with AI, using my blog as a real-world example. Perfect for tech enthusiasts and professionals, this hands-on guide is your entry point to local AI with .NET.
Why Run IA Locally?
Running AI locally means hosting LLMs like Llama or Phi on your own machine, bypassing cloud platforms like OpenAI or Azure. This is ideal for tasks like generating blog content, analyzing data, or prototyping apps, especially when privacy or budget is a concern. For AI Mind Center, local AI lets me brainstorm post ideas without sharing sensitive drafts. Key benefits include:
- Privacy: Keep data on your device, perfect for sensitive projects.
- Cost Savings: No recurring cloud fees—setup is free after installation.
- Customization: Tailor models for specific tasks, like drafting tech articles.
- Offline Access: Work without internet, great for secure or remote setups.
Think of Ollama as a personal AI assistant on your computer, ready to process data without leaving your desk. It’s a game-changer for anyone in tech looking to integrate AI seamlessly.
Prerequisites
To get started with Ollama and .NET, you’ll need:
- Hardware: A machine with at least 8GB RAM and a decent CPU or GPU. I use an NVIDIA RTX-4060 with 8GB VRAM, which handles models like llama3.2-vision:11b smoothly. Most modern laptops or desktops (e.g., 16GB RAM) work well.
- Operating System: Ollama supports Windows, Linux, and macOS. I tested this on Windows 11, but it’s cross-platform.
- .NET Environment: .NET 8 SDK, installed via Visual Studio or the .NET CLI, standard for modern development.
- Ollama: Download from ollama.com. Installation is simple—just download the installer for your OS and run it, no complex configuration needed.
- NuGet Package: The OllamaSharp package for .NET, installed via Visual Studio or the CLI with:
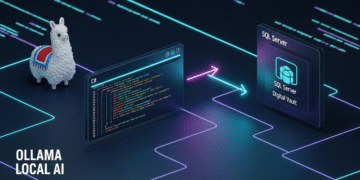
dotnet add package OllamaSharp - Optional Database: For advanced integrations, a database like SQL Server or PostgreSQL can store data (e.g., blog drafts), but this guide starts with a basic chat.
This setup ensures you’re ready to dive into local AI with minimal friction.
Step-by-Step: Setting Up Ollama with .NET
Here’s how I set up Ollama to interact with a .NET app for AI Mind Center, keeping it simple for your first AI experience:
- Install Ollama
Download the installer from ollama.com and run it. The process is straightforward—follow the prompts, and Ollama sets up in minutes. To verify installation, open a terminal and type:ollamaThis displays Ollama’s command-line help, confirming it’s installed. Next, check the API endpoint by visiting http://localhost:11434 in your browser. You should see “Ollama is running”, indicating the server is active. - Choose and Manage Models
For this guide, I chose the llama3.2-vision:11b model, which excels at text and vision tasks, ideal for generating blog content ideas. Ollama offers many models—explore them at ollama.com/library. Manage models with these terminal commands:- List Models: View installed models:
ollama list - Download Model: Pull llama3.2-vision:11b:
ollama pull llama3.2-vision:11b - Run Model: Start and interact with the model:
ollama run llama3.2-vision
- List Models: View installed models:
- Create a .NET Project
In a terminal, create a .NET 8 console app named OllamaIntegration with:dotnet new console -o OllamaIntegrationThis sets up a new directory called OllamaIntegration with a basic console app. Open it in Visual Studio or your IDE, then install the OllamaSharp package to interact with Ollama’s API:dotnet add package OllamaSharpThis library simplifies sending prompts and handling responses, perfect for developers new to AI. - Write the Code
Below is a simple C# snippet to interact with Ollama, designed for first-time AI users:
using OllamaSharp;

// Create the OllamaApiClient instance
var uri = new Uri("http://localhost:11434");
var client = new OllamaApiClient(uri);

var models = await client.ListLocalModelsAsync();

// Set the selected model
client.SelectedModel = "llama3.2-vision:latest";

// Create a Chat instance
var chat = new Chat(client);
Console.WriteLine(">> Enter your prompt: <<");

var prompt = Console.ReadLine() ?? string.Empty;

await foreach (var response in chat.SendAsync(prompt))
    Console.Write(response);

Console.WriteLine();
Console.WriteLine(">> Done! <<");- Run and Test
Start Ollama, run the .NET app, and enter a prompt (e.g., “Explain AI in 50 words”). The app sends it to llama3.2-vision:11b and streams the response. For AI Mind Center, I use this to brainstorm post ideas, cutting prep time by 50%. Testers can validate responses for accuracy, while analysts can craft prompts for specific goals. - Optional Database Integration
For tasks like managing blog drafts, connect to a database (e.g., SQL Server or PostgreSQL). For example, you could extend the code to pull content:
var connectionString = "your-database-connection-string";
using var conn = new SqlConnection(connectionString);
await conn.OpenAsync();
var cmd = new SqlCommand("SELECT Content FROM BlogPosts WHERE Id = @Id", conn);
cmd.Parameters.AddWithValue("@Id", 1);
var content = (string)await cmd.ExecuteScalarAsync();
var prompt = $"Summarize this in 50 words: {content}";- This keeps the example simple but shows how developers can integrate with data sources.
Challenges and Solutions
Setting up Ollama had challenges:
- Hardware Limits: My RTX-4060 with 8GB VRAM handled llama3.2-vision:11b well, but larger models like Llama 3.3 need more memory. Solution: Use smaller models like Phi or llama3.2-vision for modest setups; 16GB RAM is ideal.
- Installation Issues: Some miss the endpoint check. Solution: Verify http://localhost:11434 shows “Ollama is running.”
- Model Selection: Choosing the right model was tricky. Solution: I tested llama3.2-vision:11b for its speed and capability, guided by ollama.com/library.
- Prompt Quality: Vague prompts gave generic responses. Solution: Use specific prompts (e.g., “Explain AI for beginners”), which analysts can refine.
Applications for Tech Professionals
This setup benefits various roles:
- Developers: Build AI-powered apps, like chatbots or content generators, integrating with databases for dynamic data. The simple .NET code above is a starting point for custom solutions.
- Testers: Validate AI outputs for accuracy, comparing responses to expected results (e.g., checking a summary against source data).
- Business Analysts: Define prompts to automate tasks like generating reports or brainstorming ideas, streamlining workflows without coding.
For AI Mind Center, I use this to generate post ideas and analyze reader comments, saving hours weekly. Developers can adapt it for app features, testers for quality checks, and analysts for process automation.
Scaling Up
To take this further:
- Multiple Models: Test models like Llama 3.3 with:
ollama pull llama3.3 - Database Integration: Process multiple records for batch tasks, like summarizing a blog archive.
- Monitoring: Log AI usage with tools like Serilog for performance tracking.
This approach has streamlined AI Mind Center’s content creation and can enhance any tech project.
Conclusion
Running AI locally with Ollama and .NET is a simple, powerful way to automate tasks securely. For AI Mind Center, it’s sparked creative content ideas, and for any tech enthusiast, it’s a gateway to smarter development.


